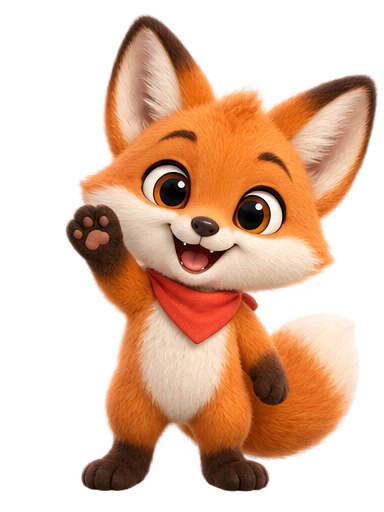
Why a Media Source beats a browser source for a mascot
Most stream overlays arrive as browser sources: a URL from an alerts service, rendered by a Chromium instance inside OBS. That is the right tool for alerts that need live data (the donor’s name, the sub count). For a mascot that simply exists on screen, or reacts with a fixed animation, a browser source is heavy machinery: it costs RAM, it can stutter when the page repaints, and it depends on a third-party service staying up during your stream.
A Media Source pointing at a local transparent WebM does the same visual job with none of that. OBS decodes it with its built-in FFmpeg, the alpha channel is honoured, it loops perfectly, and it keeps working when your internet flickers. It also survives a change of alerts provider: the character is a file on your disk, not a setting in someone else’s dashboard.
The rest of this guide assumes you have a transparent WebM of the character. If you are building the character from scratch, the prompt guide has stream-oriented examples; if you already have channel art, animate it from the image.
Adding the mascot to OBS Studio, step by step
- In the Sources dock, click + and choose Media Source. Name it something you will recognise in a year (“Mascot – idle loop”).
- Tick Local File and browse to the WebM.
- Tick Loop for an idle character. Leave it unticked for one-shot reactions (next section).
- Tick Restart playback when source becomes active. This makes the clip start from frame one whenever the scene it lives in is switched to, or whenever you un-hide it.
- Leave Use hardware decoding when available ticked. VP9 with alpha decodes in software on many GPUs anyway, but it does no harm.
- Leave Close file when inactive unticked for the idle loop (it removes the tiny restart delay) and ticked for reaction clips that are usually hidden.
- Leave Show nothing when playback ends ticked for reaction clips, so the character disappears cleanly instead of freezing on its last frame.
- Click OK. The character appears on a transparent background in the preview. Drag to position; hold Alt while dragging an edge to crop if needed.
If you see a solid black square instead of transparency, the file is not a transparent WebM (it may be an MP4 renamed, or a WebM encoded without an alpha plane). The formats guide lists the symptoms and fixes; the short version is to re-export from the source rather than fighting the file.
Streamlabs Desktop follows the same steps: + › Media File, choose the WebM, tick Loop. The option names match OBS Studio closely because Streamlabs is built on it.
Scale, position, and the parts of the screen you cannot use
The exports are 720×720. On a 1920×1080 canvas that is two thirds of the frame height at 100%; for a corner mascot you will usually run it at 25–40% (a character 180–290 pixels tall). Scale in the Transform dialog (Ctrl/Cmd+E) with a bounding box type of Scale to inner bounds so it stays square. On a 1440p or 4K canvas, scale proportionally; the character is soft-edged and forgives upscaling far better than text does.
Where to put it depends on what else the viewer is looking at:
- Bottom corners are conventional but are where Twitch and YouTube draw their own chat and reaction overlays on mobile. If you care about phone viewers, move the character up by at least 10% of frame height.
- Beside the webcam frame, leaning in, is the most natural placement for a companion: the character and the streamer read as a pair.
- On top of a lower-third panel (the bar with your socials) works if the character is small and the panel is plain.
- Never over the game’s HUD. Minimaps, health bars, and kill feeds are sacred. Check your most-played games and add a guide line in OBS to remind yourself.
Give the character a resting place and keep it there. Viewers build a mental map of your layout, and a mascot that moves between streams is oddly disorienting.
One-shot reactions: wave, cheer, sulk, on demand
An idle loop makes the character present. Reactions make it feel alive. The pattern is one Media Source per reaction clip, hidden by default, shown for the duration of the clip and hidden again.
Manual triggers with hotkeys
- Add each reaction WebM as its own Media Source: Loop off, Restart playback when source becomes active on, Show nothing when playback ends on.
- Hide it (the eye icon).
- In Settings › Hotkeys, find the source and assign a key to Show. Assign the same key to Hide on the idle-loop source if you want the idle character to disappear while the reaction plays; otherwise stack the reaction on top of the idle source at the same position and let it cover it.
Because the reaction ends by showing nothing, you do not need a second hotkey to hide it. Re-pressing the key replays it thanks to the restart-on-active setting. A Stream Deck or any macro pad makes this a one-button “cheer”.
Automatic triggers from events
To fire a reaction when a follow, sub, raid, or channel-point redemption happens, you need something that listens to those events and toggles the source. The two common routes:
- Advanced Scene Switcher (a free OBS plugin) can watch Twitch or YouTube events directly and run a macro: show source, wait N seconds, hide source. This keeps everything inside OBS.
- Your alerts service (StreamElements, Streamlabs, Fourthwall, and others) lets you upload custom media for each alert type. Upload the WebM as the alert’s video; the transparent background composites over whatever is behind the alert. Check the service’s size limit (most accept a few megabytes) and match the alert duration to the clip length (4 to 12 seconds, chosen when you generate it) so it does not cut off.
Reaction clips work best when each one is a single unmistakable gesture: a wave for follows, a bounce for subs, a jump for raids, a sulk for a lost match triggered by a channel-point redemption called “Mock the streamer”. Five reactions cover a whole channel’s vocabulary; the motion-system section of the app mascot guide describes the same five-clip idea from the product side.
Scenes: starting soon, BRB, intermission, ending
The non-gameplay scenes are where a mascot earns the most affection per minute, because there is nothing else to watch. Some patterns that work:
- Starting soon: the character large and central, running a busy loop (“tinkers with a cable”, “stretches and warms up”), with the countdown beside it. Change the loop every few weeks; regulars notice.
- Be right back: the character asleep, or reading. A custom motion like “settles in with a book and turns a page” on loop is perfect: calm, obviously temporary.
- Intermission or ad break: the character with a “back in a moment” gesture, over a dimmed capture of the last frame of gameplay.
- Ending: a wave, played once and then held on the last frame (untick Show nothing when playback ends for this one) while the raid target is chosen.
Each scene gets its own Media Source pointed at the appropriate clip, with Restart playback when source becomes active ticked so the clip begins cleanly every time you switch to it. Add a Stinger Transition (Settings › Scene Transitions) using a short transparent WebM of the character sweeping across if you want the character to own the scene changes too; OBS stingers accept WebM with alpha directly.
From the same character to emotes, stickers, and panels
Once a character exists, viewers want it in chat. The GIF export is the starting point for animated emotes; the still design is the starting point for static ones. Current platform limits, which you should verify against each service’s help pages before uploading because they do change:
| Destination | Size | Format | File limit | Notes |
|---|---|---|---|---|
| Twitch animated emote | 112×112 (auto-resizes down) | GIF or APNG | 1 MB | Keep to roughly 8–15 frames; the full 24 fps clip will exceed the limit. |
| Twitch static emote | 112×112, 56×56, 28×28 | PNG | 1 MB | Crop the face from the approved design; whole-body emotes are unreadable at 28 px. |
| Discord animated emoji | 128×128 | GIF | 256 KB | Very tight; 6–8 frames at low fps. |
| Discord sticker | 320×320 | PNG or APNG (not GIF) | 512 KB | Convert the GIF or a PNG sequence to APNG. |
| Channel panels (Twitch) | 320 px wide | PNG or JPG | — | Panels are static; use the still design. |
To get a six-second, 24 fps GIF under 1 MB at 112 pixels, drop the frame rate to 8–10 fps and trim to the two or three seconds where the gesture happens. The FFmpeg palette recipe in the formats guide applies; change fps=15 to fps=10, scale=480 to scale=112, and add -t 2.5 before the output to trim. For Discord stickers, feed the same frames to an APNG assembler (ffmpeg -i in.webm -t 2.5 -vf "fps=12,scale=320:-1" -plays 0 out.apng) and check the size; reduce fps until it fits.
A mascot that appears on stream, in chat, in Discord, and on the channel page is a brand, and it was one character design and a handful of motion prompts. Nothing here required a rig, a Live2D model, or a browser source.
Pre-stream checklist
- Idle mascot: Loop on, restart-on-active on, positioned clear of HUD and mobile chat overlays.
- Reaction clips: Loop off, show-nothing-when-ended on, hotkeys or event triggers tested with a real event (send yourself a test follow from your alerts dashboard).
- Scene clips: one Media Source per scene, each starting from frame one on switch.
- Files stored in a folder that is backed up and not going to be renamed; OBS references absolute paths.
- A stinger transition, if used, is under two seconds and does not obscure the game for longer than that.
- CPU check: with all sources active, OBS’s Stats window shows no rendering lag. Transparent VP9 is light, but five simultaneous loops on an old laptop are not.
Streaming counts as personal use on the Free, Starter, and Creator plans; if the channel is a business (sponsored content, an agency running it), the Professional plan includes the commercial licence. Details are on the pricing page.